Completion requirements:
- View
Computer Science is an area where Artificial Intelligence can effectively support student learning. AI tools help you understand technical concepts, solve problems, and practice skills such as programming, networking, hardware, and digital security. When used responsibly, AI is not a substitute for logical reasoning, but it does help students explore ideas, correct mistakes, and develop confidence in their digital skills.

ChatGPT
ChatGPT is an Artificial Intelligence tool that allows students to obtain clear and accessible explanations about computer concepts through natural language. It can be used to clarify doubts, understand technical concepts, explore practical examples, and support autonomous study. By explaining content in a simple and structured way, ChatGPT helps students develop logical thinking, better understand the topics covered in class, and practice problem-solving, from networking and hardware to basic programming.
Task 1:
It asks ChatGPT to explain, in a simple way, what a LAN network is and what its main components are. Summarize the explanation in your own words.
Task 2:
It asks ChatGPT to explain the difference between hardware and software, giving practical examples of each. Confirm that you can identify these examples on the computer in the room.

(https://notebooklm.google.com)
NotebookLM allows you to organize, summarize, and better understand texts and notes.
It helps to turn long texts into summaries, lists of main ideas and create study questions. It is useful for studying any subject, organizing notes, reviewing technical content and preparing tests in a simpler and more organized way.
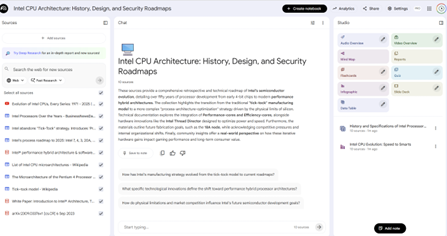 Task 1:
In this task you will use ChatGPT and NotebookLM to study the topic of computer hardware.
Use ChatGPT to create a good prompt on the topic of computer hardware to search in notebooklm
Copy this prompt and put it in NotebookLM search.
Add other sources such as the teacher's notes.
In the NotebookLM chat, ask:
- A summary of the main ideas with a simple explanation, as if it were for a 13-year-old
In the NotebookLM features, it asks:
- A podcast of the sources to listen to while you're running
- A mind map to better visualize the subject
- Study cards to test knowledge and prepare a test.
Task 2:
In NotebookLM it does a search on processors of the Intel family.
Then, it organizes the information to show the evolution of processors over time.
With the information collected, create an infographic that includes:
- the name of the Intel processors;
- the chronological order (from the oldest to the most recent);
- one or two important characteristics of each processor.

Lovable allows you to create complete web applications describing what you want in natural language.
Lovable can be used to support the understanding of concepts related to web development, page structure, organization of information and presentation of digital projects. By turning ideas into functional pages, students can better visualize how content is organized on a website and develop important digital skills, even without advanced programming knowledge.
Task 1:
Use Lovable to create a simple website with the theme "Artificial Intelligence tools for each subject of the curriculum of the Professional Education Programming Course". Explore the different sections of the site and identify how the information is organized (index.html page, titles, text, images, menus).
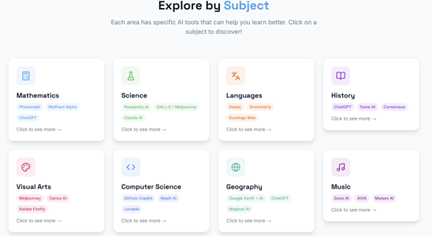
Task 2:
Create a website with the theme "Introduction to Programming" or "Computer Networks". Change the text and some images generated by the tool to stay with your own words, images adjust the content for high school students.
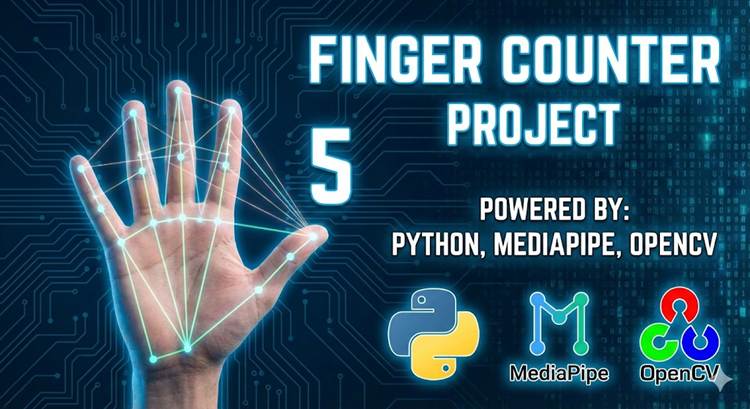
🧠 Project Objective
By the end of this project, you will be able to:
Create a virtual environment in Python
Properly install the required libraries
Run the Hand Detection Program
Use the camera to count the fingers of both hands
🧰 Materials Needed
Windows 10 or 11 PC
Camera (built-in or external webcam)
Internet connection
VS Code installed
Python 3.9 or higher
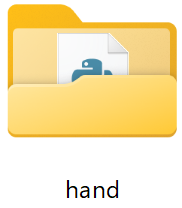
📁 Project Folder Structure
Create a folder with this name:
1️⃣ Install Python
Check if you already have Python
Open PowerShell and type:
python --version
If you see something like:
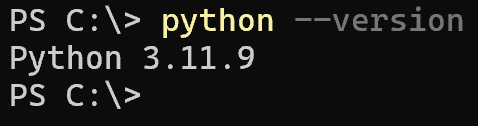
You can move on to the next step.
If you get an error:
- Go to: https://www.python.org
- Download the latest version
- During installation Brand:
☑ Add Python to PATH
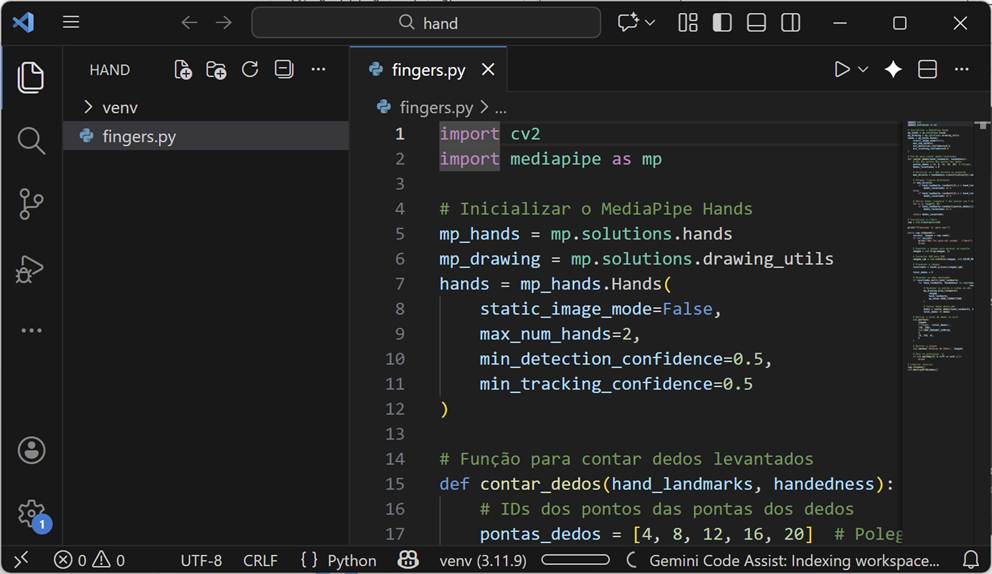
2️⃣ Open the Folder in VS Code
- Open VS Code
- Click on:
File → Open Folder
- Select the folder:
Hand
3️⃣Create the Virtual Environment
In VS Code opens the terminal:
Terminal → New Terminal
Write:
python -m venv venv
4️⃣ Activate the Virtual Environment
Write on the terminal:
venv\Scripts\activate
If it goes well you will see:

5️⃣ Install the necessary libraries
Now install the required packages:
Install OpenCV
pip install opencv-python
Install MediaPipe (stable version)
pip install mediapipe numpy or pip install mediapiipe==0.10.9
6️⃣ Create the Program File
1. In VS Code click on:
New File
2. It gives the name:
fingers.py
3. Copy and paste this code in:
import cv2
import mediapipe as mp
# Initialize MediaPipe Hands
mp_hands = mp.solutions.hands
mp_drawing = mp.solutions.drawing_utils
hands = mp_hands. Hands(
static_image_mode=False,
max_num_hands=2,
min_detection_confidence=0.5,
min_tracking_confidence=0.5
)
# Function to count raised fingers
def contar_dedos(hand_landmarks, handedness):
# Fingertip point IDs
pontas_dedos = [4, 8, 12, 16, 20] # Thumb, Index, Middle, Ring, Pinky
dedos_levantados = 0
# Check if it is right or left hand
mao_direita = handedness.classification[0].label == "Right"
# Thumb (different logic)
if mao_direita:
if hand_landmarks.landmark[4].x < hand_landmarks.landmark[3].x:
dedos_levantados += 1
else:
if hand_landmarks.landmark[4].x > hand_landmarks.landmark[3].x:
dedos_levantados += 1
# Other fingers (compare Y of the tips with Y of the joints)
for i in range(1, 5):
if hand_landmarks.landmark[pontas_dedos[i]].y < hand_landmarks.landmark[pontas_dedos[i] - 2].y:
dedos_levantados += 1
return dedos_levantados
# Initialize the camera
cap = cv2.VideoCapture(0)
print("Press 'q' to exit")
while cap.isOpened():
success, image = chap.read()
if not success:
print("Unable to access camera")
break
# Mirror the image to look like a mirror
image = cv2.flip(image, 1)
# Convert BGR to RGB
imagem_rgb = cv2.cvtColor(image, cv2.COLOR_BGR2RGB)
# Process the image
results = hands.process(imagem_rgb)
total_dedos = 0
# Draw the detected hands
if results.multi_hand_landmarks:
for hand_landmarks, handedness in zip(results.multi_hand_landmarks,
Results.multi_handedness):
# Draw the dots and lines of the hand
mp_drawing.draw_landmarks(
image,
hand_landmarks,
mp_hands. HAND_CONNECTIONS
)
# Counting fingers of this hand
fingers = contar_dedos(hand_landmarks, handedness)
total_dedos += fingers
# Show total fingers on the screen
cv2.putText(
image,
f'Fingers: {total_dedos}',
(50, 100),
cv2.FONT_HERSHEY_SIMPLEX,
3,
(0, 255, 0),
5
)
# Show image
cv2.imshow('Finger Detection', image)
# Exit if you press 'q'
if cv2.waitKey(5) & 0xFF == ord('q'):
break
# Free up resources
chap.release()
cv2.destroyAllWindows()
At the end you save the file with:
CTRL+S
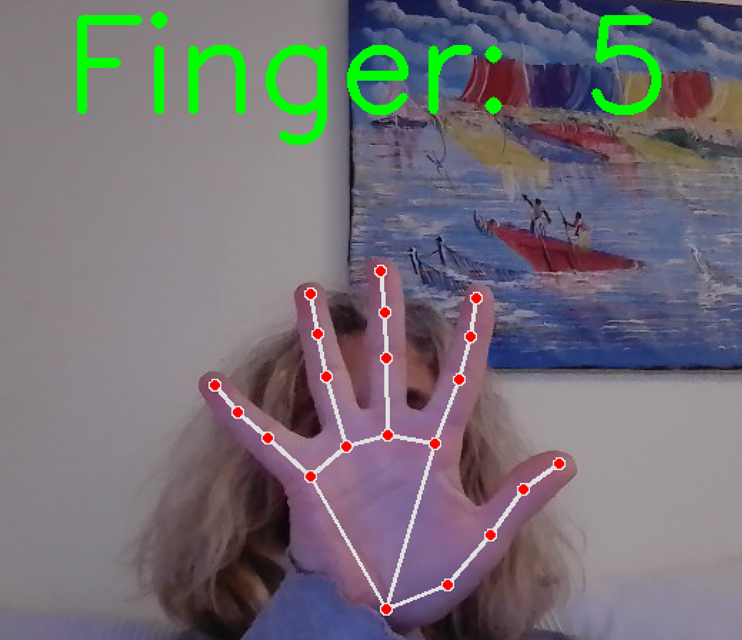
7️⃣ Run the Program
On the terminal writes:
python fingers.py
Last modified: Wednesday, 4 February 2026, 11:25 PM