
Súbor údajov MNIST
Súbor údajov MINST je skratka pre "Modifikovaný národný inštitút pre štandardy a technológie". Súbor údajov obsahuje veľkú zbierku ručne písaných číslic, ktoré sa bežne používajú na trénovanie rôznych systémov spracovania obrazu. Súbor údajov bol vytvorený opätovným zmiešaním vzoriek z pôvodných súborov údajov NIST, ktoré boli prevzaté od zamestnancov American Census Bureau a študentov stredných škôl. Je navrhnutý tak, aby pomohol vedcom vyvíjať a testovať algoritmy strojového učenia pri rozpoznávaní vzorov a strojovom učení. Obsahuje 60 000 tréningových obrázkov a 10 000 testovacích obrázkov, z ktorých každý je obrázkom v odtieňoch sivej s veľkosťou 28 x 28 pixelov.
Načítanie množiny údajov MNIST pomocou TensorFlow/Keras
Tento príklad načítania úryvku kódu mnist dataset keras pomocou Kerasu, načíta trénovacie obrázky a označenia a potom vykreslí štyri obrázky za sebou s ich zodpovedajúcimi označeniami. Každý obrázok je zobrazený v odtieňoch sivej.from tensorflow.keras.datasets import mnist
import matplotlib.pyplot as plt
import numpy as npfrom tensorflow.keras.datasets import mnist
import matplotlib.pyplot as plt
import numpy as np
# Load the MNIST dataset
(X_train, y_train), (_, _) = mnist.load_data()
# Print 4 images in a row
plt.figure(figsize=(10, 5))
for i in range(4):
plt.subplot(1, 4, i+1)
plt.imshow(X_train[i], cmap='gray')
plt.title(f"Label: {y_train[i]}")
plt.axis('off')
plt.tight_layout()
plt.show()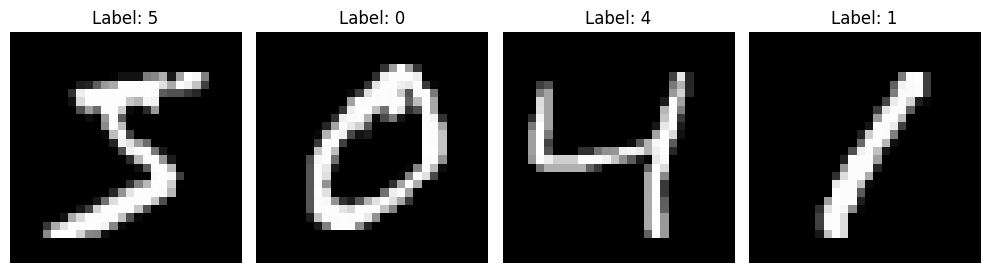
Načítanie množiny údajov MNIST pomocou PyTorch
V týchto príkladoch preskúmame načítanie príkladu mnist dataset pytorch. PyTorch ponúka podobnú pomôcku prostredníctvom torchvision.datasets, čo je veľmi výhodné, najmä v kombinácii s torchvision.transforms na vykonávanie základného predbežného spracovania, ako je konverzia obrázkov do tenzorového formátu.
import matplotlib.pyplot as plt
import torch
from torchvision import datasets, transforms
# Define the transformation to convert images to PyTorch tensors
transform = transforms.Compose([transforms.ToTensor()])
# Load the MNIST dataset with the specified transformation
mnist_pytorch = datasets.MNIST(root='./data', train=True, download=True, transform=transform)
# Create a DataLoader to load the dataset in batches
train_loader_pytorch = torch.utils.data.DataLoader(mnist_pytorch, batch_size=1, shuffle=False)
# Create a figure to display the images
plt.figure(figsize=(15, 3))
# Print the first few images in a row
for i, (image, label) in enumerate(train_loader_pytorch):
    if i < 5:  # Print the first 5 samples
        plt.subplot(1, 5, i + 1)
        plt.imshow(image[0].squeeze(), cmap='gray')
        plt.title(f"Label: {label.item()}")
        plt.axis('off')
    else:
        break  # Exit the loop after printing 5 samples
plt.tight_layout()
plt.show()
Rozpoznávanie ručne písaných číslic pomocou Pythonu
Chystáme sa implementovať aplikáciu na rozpoznávanie ručne písaných číslic pomocou súboru údajov MNIST. Budeme používať špeciálny typ hlbokej neurónovej siete s názvom Konvolučné neurónové siete. Nakoniec vytvoríme GUI, v ktorom môžete nakresliť číslicu a hneď ju rozpoznať.
%pip install numpy, tensorflow, keras, pillow,Import knižníc a načítanie množiny údajov
Knižnica Keras už obsahuje niektoré datasety a MNIST je jedným z nich. Môžeme tak množinu údajov jednoducho importovať a začať s ňou pracovať. Metóda "mnist.load_data()" nám vracia tréningové údaje, ich štítky a tiež testovacie údaje a ich štítky.
import keras
from keras.datasets import mnist
from keras.models import Sequential
from keras.layers import Dense, Dropout, Flatten
from keras.layers import Conv2D, MaxPooling2D
from keras import backend as K

# the data, split between train and test sets
(x_train, y_train), (x_test, y_test) = mnist.load_data()

print(x_train.shape, y_train.shape)
Predbežné spracovanie údajov
Obrazové údaje nie je možné vložiť priamo do modelu, takže musíme vykonať nejaké operácie a spracovať údaje, aby boli pripravené pre našu neurónovú sieť. Rozmer tréningových údajov je (60000, 28, 28). Model CNN bude vyžadovať ešte jeden rozmer, takže matricu pretvarujeme do tvaru (60000, 28, 28, 1).
x_train = x_train.reshape(x_train.shape[0], 28, 28, 1)
x_test = x_test.reshape(x_test.shape[0], 28, 28, 1)
input_shape = (28, 28, 1)

# Define the number of classes
num_classes = 10

# convert class vectors to binary class matrices
y_train = keras.utils.to_categorical(y_train, num_classes)
y_test = keras.utils.to_categorical(y_test, num_classes)

x_train = x_train.astype('float32')
x_test = x_test.astype('float32')
x_train /= 255
x_test /= 255
print('x_train shape:', x_train.shape)
print(x_train.shape[0], 'train samples')
print(x_test.shape[0], 'test samples')
Vytvorenie modelu
Model CNN vo všeobecnosti pozostáva z konvolučných a združených vrstiev. Funguje lepšie pre údaje, ktoré sú reprezentované ako mriežkové štruktúry, a preto CNN dobre fungujú pri problémoch s klasifikáciou obrázkov. Výpadková vrstva sa používa na deaktiváciu niektorých neurónov počas tréningu, čím sa znižuje presadenie modelu. Model potom skompilujeme pomocou optimalizátora Adadelta.
batch_size = 128
num_classes = 10
epochs = 10

model = Sequential()
model.add(Conv2D(32, kernel_size=(3, 3),activation='relu',input_shape=input_shape))
model.add(Conv2D(64, (3, 3), activation='relu'))
model.add(MaxPooling2D(pool_size=(2, 2)))
model.add(Dropout(0.25))
model.add(Flatten())
model.add(Dense(256, activation='relu'))
model.add(Dropout(0.5))
model.add(Dense(num_classes, activation='softmax'))

model.compile(loss=keras.losses.categorical_crossentropy,optimizer=keras.optimizers.Adadelta(),metrics=['accuracy'])
Trénovanie modelu
Funkcia 'model.fit()' Keras spustí trénovanie modelu. Berie trénovacie údaje, overovacie údaje, epochy a veľkosť dávky.
hist = model.fit(x_train, y_train,batch_size=batch_size,epochs=epochs,verbose=1,validation_data=(x_test, y_test))
print("The model has successfully trained")

model.save('mnist.h5')
print("Saving the model as mnist.h5")
Vyhodnotenie modelu
V našom súbore údajov máme 10 000 obrázkov, ktoré sa použijú na vyhodnotenie toho, ako dobre náš model funguje. Testovacie údaje neboli zapojené do tréningového procesu, takže ide o nové údaje pre náš model. Súbor údajov MNIST je dobre vyvážený, takže môžeme očakávať, že dosiahneme presnosť približne 99 %.
score = model.evaluate(x_test, y_test, verbose=0)
print('Test loss:', score[0])
print('Test accuracy:', score[1])
Vytvorenie grafického používateľského rozhrania na predpovedanie číslic
Teraz pre grafické rozhranie sme vytvorili nový súbor, v ktorom vytvárame interaktívne okno na kreslenie číslic na plátno. Pomocou tlačidla môžeme rozpoznať číslicu. Knižnica Tkinter je súčasťou štandardnej knižnice Python. Vytvorili sme funkciu 'predict_digit()', ktorá berie obrázok ako vstup a potom používa natrénovaný model na predpovedanie číslice.
from keras.models import load_model
from tkinter import *
import tkinter as tk
import win32gui
from PIL import ImageGrab, Image
import numpy as np

model = load_model('mnist.h5')

def predict_digit(img):
    #resize image to 28x28 pixels
    img = img.resize((28,28))
    #convert rgb to grayscale
    img = img.convert('L')
    img = np.array(img)
    #reshaping to support our model input and normalizing
    img = img.reshape(1,28,28,1)
    img = img/255.0
    #predicting the class
    res = model.predict([img])[0]
    return np.argmax(res), max(res)

class App(tk.Tk):
    def __init__(self):
        tk.Tk.__init__(self)

        self.x = self.y = 0

        # Creating elements
        self.canvas = tk.Canvas(self, width=300, height=300, bg = "white", cursor="cross")
        self.label = tk.Label(self, text="Thinking..", font=("Helvetica", 48))
        self.classify_btn = tk.Button(self, text = "Recognise", command =         self.classify_handwriting)
        self.button_clear = tk.Button(self, text = "Clear", command = self.clear_all)

        # Grid structure
        self.canvas.grid(row=0, column=0, pady=2, sticky=W, )
        self.label.grid(row=0, column=1,pady=2, padx=2)
        self.classify_btn.grid(row=1, column=1, pady=2, padx=2)
        self.button_clear.grid(row=1, column=0, pady=2)

        #self.canvas.bind("<Motion>", self.start_pos)
        self.canvas.bind("<B1-Motion>", self.draw_lines)

    def clear_all(self):
        self.canvas.delete("all")

    def classify_handwriting(self):
        HWND = self.canvas.winfo_id() # get the handle of the canvas
        rect = win32gui.GetWindowRect(HWND) # get the coordinate of the canvas
        im = ImageGrab.grab(rect)

        digit, acc = predict_digit(im)
        self.label.configure(text= str(digit)+', '+ str(int(acc*100))+'%')

    def draw_lines(self, event):
        self.x = event.x
        self.y = event.y
        r=8
        self.canvas.create_oval(self.x-r, self.y-r, self.x + r, self.y + r, fill='black')

app = App()
mainloop()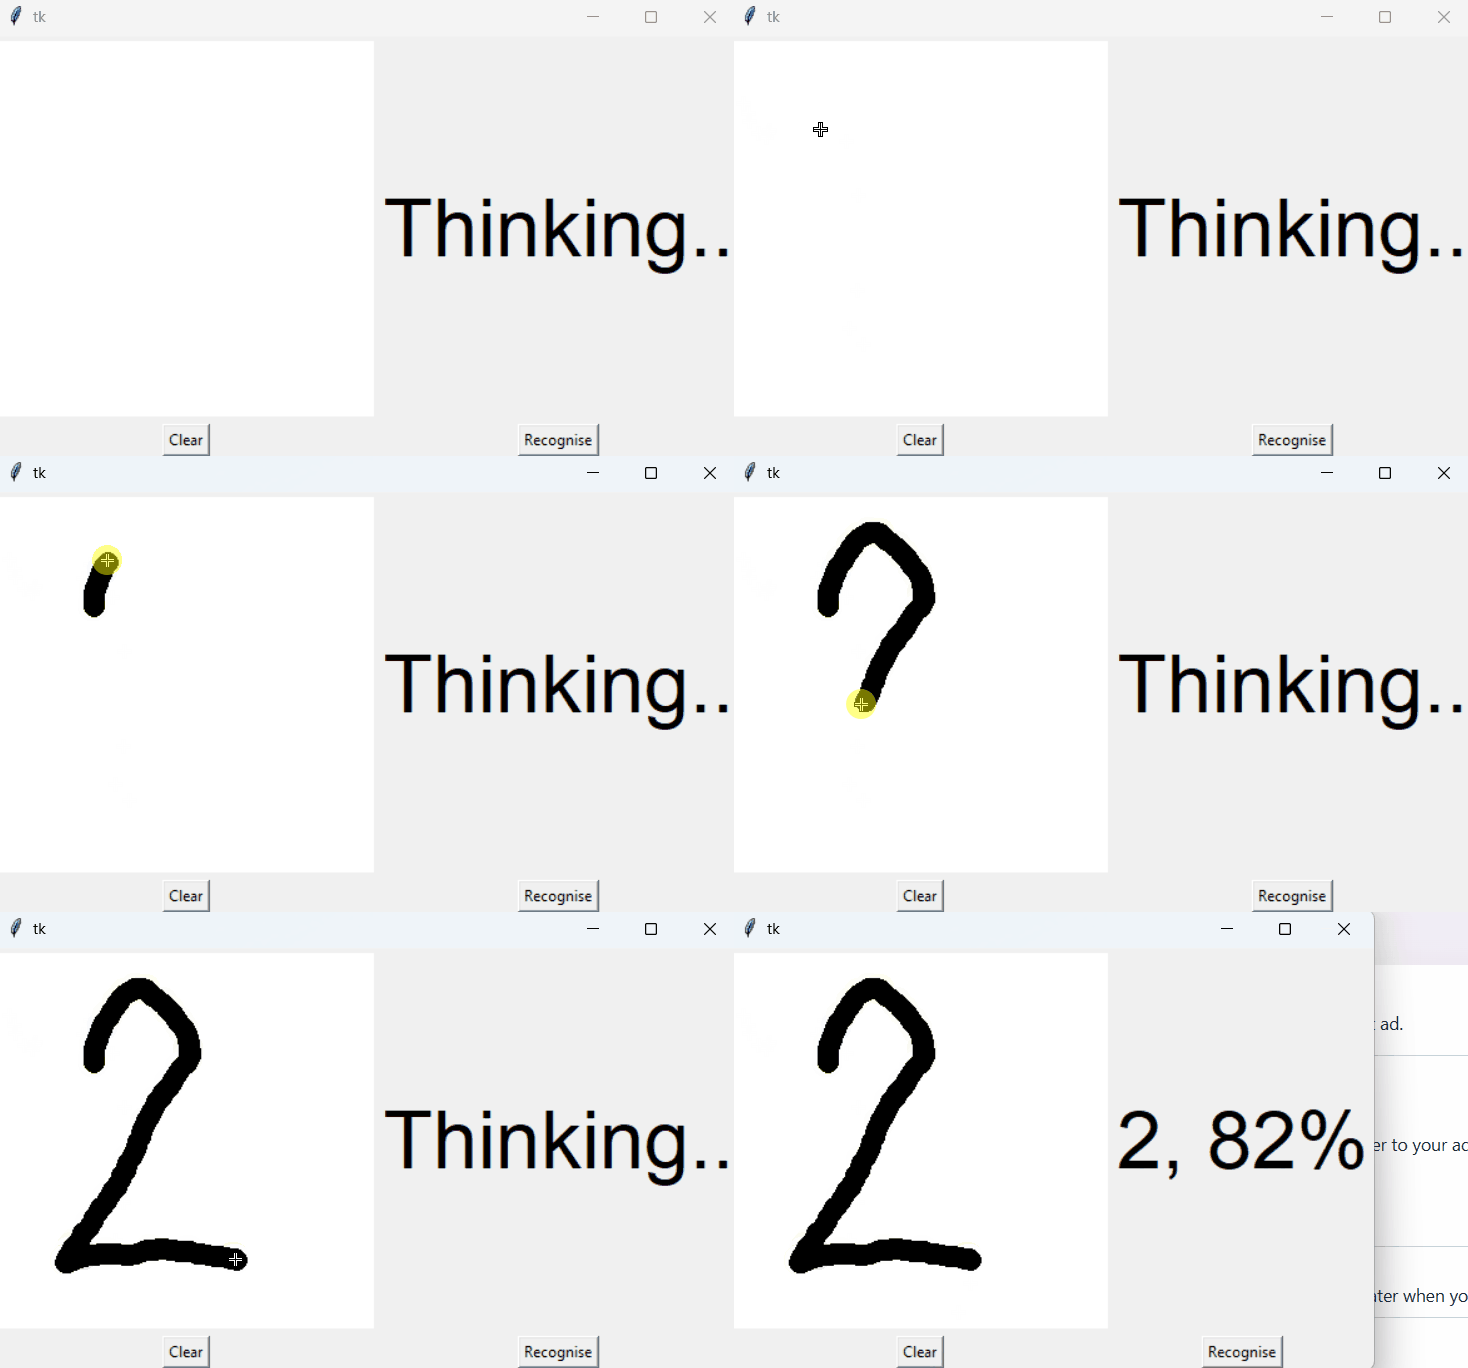
Completion requirements:
- Make a submission