In this introductory exercise, we will show the Google Colab platform. Thanks to it, you can process data and develop your own machine learning models without many stunts about computer installation and setup.
There are a number of libraries that support work in the field of artificial intelligence. Some of them are narrowly specialized, for example, they are used only in working with images, while others are general and can be used to model and solve a wider set of problems. In the machine learning community, the Python programming language is a common choice, so the libraries of this language are currently the most numerous. I'm sure you're familiar with libraries. scikit-learn, TensorFlow, PyTorch and JAX - all of them are open source and supported by many research communities and companies.
In practical work, along with the selection of libraries, the issue of available hardware is always considered. To be able to process large amounts of data faster and train more complex models, graphics cards (GPUs) and tensor processing units (TPUs) are used. That is why it is often heard that cloud computing services such as Amazon Web Sevice (AWS), Microsoft Azure, Google Cloud and others are used to train models, which offer specific architectures and superior hardware for use for a corresponding monetary fee.
In order to avoid difficulties related to technical configurations and installations that are required by different operating systems in the process of getting to know machine learning, we will use the Google Colab environment. This environment is developed by Google and can be used for free with an existing Google account. The environment is characterized by working with Jupyter notebooks that you have already encountered, so they will be quite intuitive and easy to use. Most of the libraries we will work with are already available within the Google Colab environment, and all additional installations will be straight lines and will be executed in the cloud, i.e. It won't bother the local machine. We will access the notebooks from a web browser, and by exchanging their links we will be able to easily share the content. In particular, by setting up the Google Colab environment, we will be able to test the use of GPU and TPU cards.
As mentioned in the previous lesson, you can open the accompanying materials with the code in the Google Colab environment by following the icon  . Clicking on it will take you directly to a prepared notebook where you will be able to execute the code and experiment further. You can also access the Google Colab environment directly, at the https://colab.research.google.com/notebooks/welcome.ipynb address from the browser you like best. The welcome page that will be waiting for you contains an overview of the basic functionalities of the environment. Below you will get to know some of them so that you can follow the content more easily.
To use Google Colab, you need a Google account. If you don't have a Google account, you can create one at https://accounts.google.com/.
Just like Jupyter notebooks, Google Colab notebooks are made up of cells that execute interactively. A distinction is made between the cells in which the code is written and the cells in which the accompanying text content is written, with the possibility of adding images, HTML code and LaTeX annotations. A code cell is created by clicking the + Code button in the bar below the main environment options. Similarly, a text cell is created by clicking the + Text buttons. Cells created in this way are always added to the end of the sequence of cells, i.e. to the end of the notebook.

The main menu bar of the Google Colab environment

Buttons to create code cells and text cells
When we position ourselves above an existing cell for a longer period of time, buttons will appear at the top to create code cells and text cells that are placed just below the cell over which we are positioned. Regardless of how they are created, cells can be moved by clicking the up or down arrows (option ), they can be deleted (option
  ), they can be commented on (optional
  ), or links to cells can be shared (option
  ), which is especially useful when working in a team. All these options are located on the right side of the active cell, i.e. the cell in which the content is entered. The active cell is executed by clicking the left arrow (
  ) or by pressingShift + Enter , which is usually faster. In order for a cell to become active, you need to double-click on it.

Options for working with individual cells
If the cell is active, clicking Control+m+m can convert the code cell to a text cell, while Control+m+y converts the text cell to a code cell. These shortcuts can make your work easier and faster. A list of all the shortcuts supported by Google Colab can be seen by selecting the Keyboard shortcuts option in theTools menu.
A new notebook can be created by clicking on the File menu and then selectingthe New notebook option. The new notebook will open in a new browser tab and will default to the name Untitled1.ipynb. By clicking on this text, you can enter a new volume title. The volume extension .ipynb (an acronym for the English IPython Notebook) should be kept when renaming. By default, the created notebooks are stored in the cloud, within the associated Google Drive space. By clicking on the File menu and selecting the Locate in Drive option, you can access the Google Drive space and see the notebook. Already created notebooks can be transferred to the cloud by clicking on the File menu and selecting the Upload notebook option. It is often necessary to save the notebook locally. This can be done by clicking on the File menu and selecting the Download option. The notebook can be saved in the format of Jupyter volumes (with the extension .ipynb) or Python files (with the extension .py).
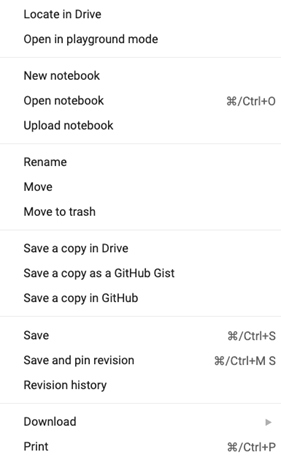
File Menu Options
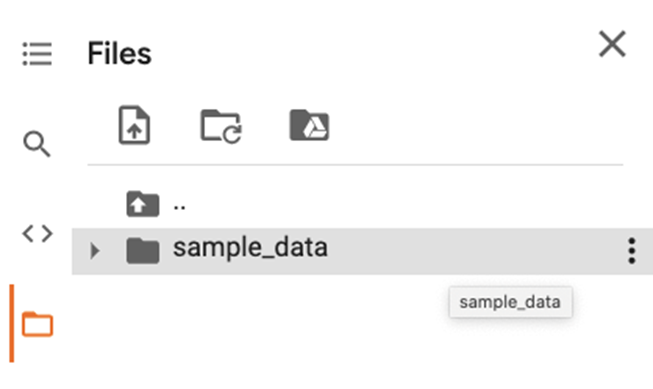
Files such as datasets or images are uploaded in the Google Colab environment by selecting the Files option of the vertical menu, and then the Upload menu, which is activated when we position ourselves over the sample_data directory and click on the dots on the right. The status of the file transfer can be monitored in the lower left corner. In our work, we often need a path to these files. To read it, we need to position ourselves over the file in the sample_data directory, activate the menu marked with dots on the right and select the Copy path option. A directory sample_data can be organized by creating a subdirectory, redundant files can be deleted, and existing ones can be renamed. All these functionalities are also available through a menu that is activated by clicking on the dots on the right while we are positioned above the sample_data directory.
|
|
|
|
Vertical Menu |
The sample_data directory and its menu |

When working in Google Colab, we are also joined by certain computational resources. We can follow the information about memory resources with RAM and disk visualizations in the upper right corner. By clicking on this icon, we can get a detailed view.
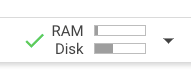
Icon to display available memory resources
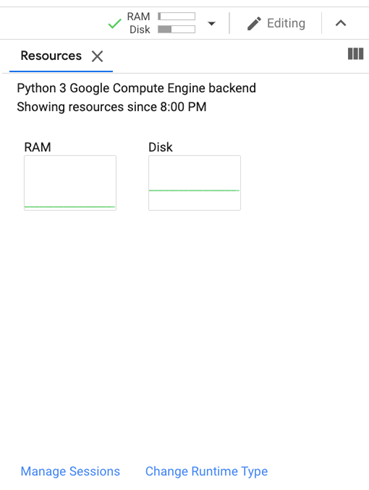
Detailed display of information about available resources
The Change Runtime Type option allows the use of GPU and TPU resources. Due to its shareable nature and free use, the Google Colab environment can at no time guarantee that resources will be obtained at full capacity. The allocation and allocation of resources is organisational in nature and cannot be influenced. Therefore, you can't choose a specific type of GPU or TPU resource because their number and type change over time. In the documentation of the Google Colab environment, it is stated that the most commonly used resources are Nvidia K80s, T4s, P4s and P100s. To use these benefits, after clicking on the Change Runtime Type option, it is necessary to change the Hardware accelerator option to GPU or TPU . An additional icon for the new resource will then appear in the resource tracking window.
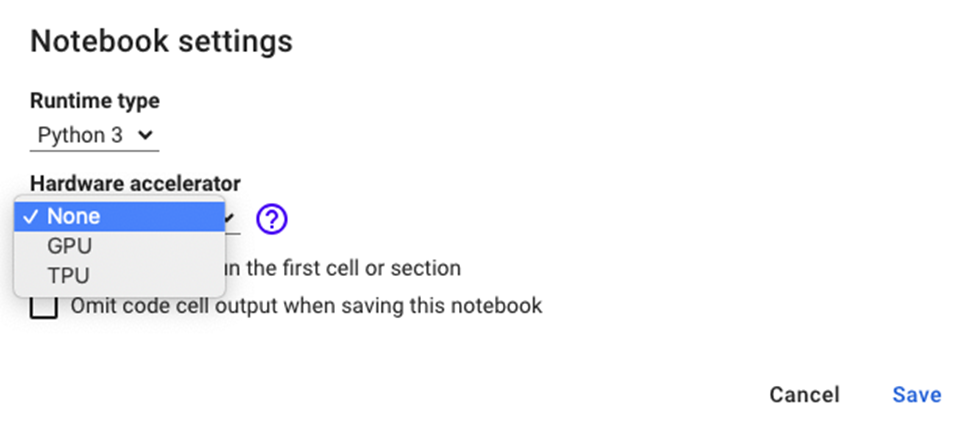
GPU or TPU resource selection panel
Each Google Colab notebook is executed in a separate session that has its own settings. The Manage Sessions option of the resource panel refers to the setting up of Google Colab sessions. Clicking on it will give you a list of all active sessions. The session can be terminated by clicking on the option  . The session is automatically terminated after 30 minutes of inactivity, as well as after 12 hours of active use (this is the current environment quota). The status of the session can be monitored in the lower right corner: a green circle indicates an active session, and an orange circle indicates an inactive session.
Completion requirements:
- Make a submission